FreePBX is a web-based open source GUI (graphical user interface) that controls and manages Asterisk (PBX), an open source communication server. FreePBX is licensed under the GNU General Public License (GPL), an open source license. FreePBX can be installed manually or as part of the pre-configured FreePBX Distro that includes the system OS, Asterisk, FreePBX GUI and assorted dependencies. Read More
Before continuing with this guide, please review our Asterisk Design Guide for considerations that affect all Asterisk-based deployments.
This guide assumes that you have a working FreePBX installation, and that you have command line access to that system. This guide also assumes that you're using an Analog Telephony Adapter (ATA) to connect your fax machine to FreePBX. Any of our Certified ATAs will work for this purpose. In choosing which of these guides to follow, we recommend use of PJSIP over chan_sip on new installations, both because it is the SIP driver that currently receives core support and because it uses a nonstandard SIP port, UDP port 5160, as its default. The advantage of using a nonstandard SIP port is further explained here.
Requirements: FreePBX 12.0.74+ with Asterisk 13.4+
Adjust Your SIP Settings
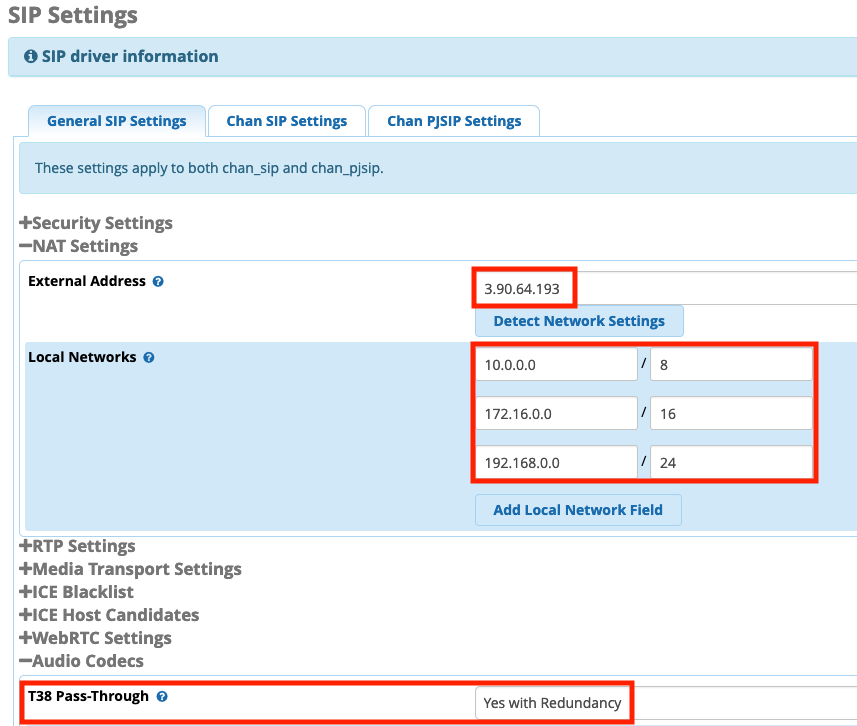
Navigate to Settings - Asterisk SIP Settings from the upper right hand menu, and then to the General SIP Settings tab. If you are behind a NAT, check the NAT Settings section at the top of this page, ensuring you have your external IP address and local networks specified. Here we have specified all local networks as defined by RFC1918. These NAT settings, along with the opening/port forwarding of all SIP and UDPTL ports, allow T.38 traffic to pass through your firewall. For more information, see our Asterisk Design Guide.
Also on the General SIP Settings tab, but at the very bottom of the page, find the Audio Codecs section and configure T38 Pass-Through: Yes with Redundancy.
While still under the Asterisk SIP Settings menu, navigate to the Chan SIP Settings tab and configure the following NAT Settings:
- NAT: Yes
- IP Configuration: Static IP
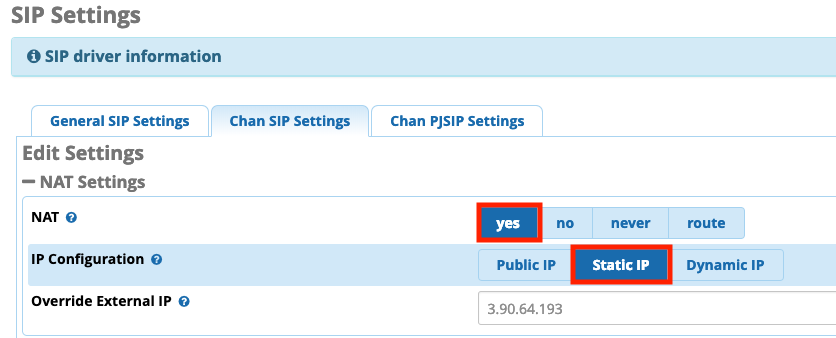
Other means of setting the external IP are possible as well, so long as the FreePBX is aware of its external IP. Submit your changes and apply your configuration.
Create Your Trunk
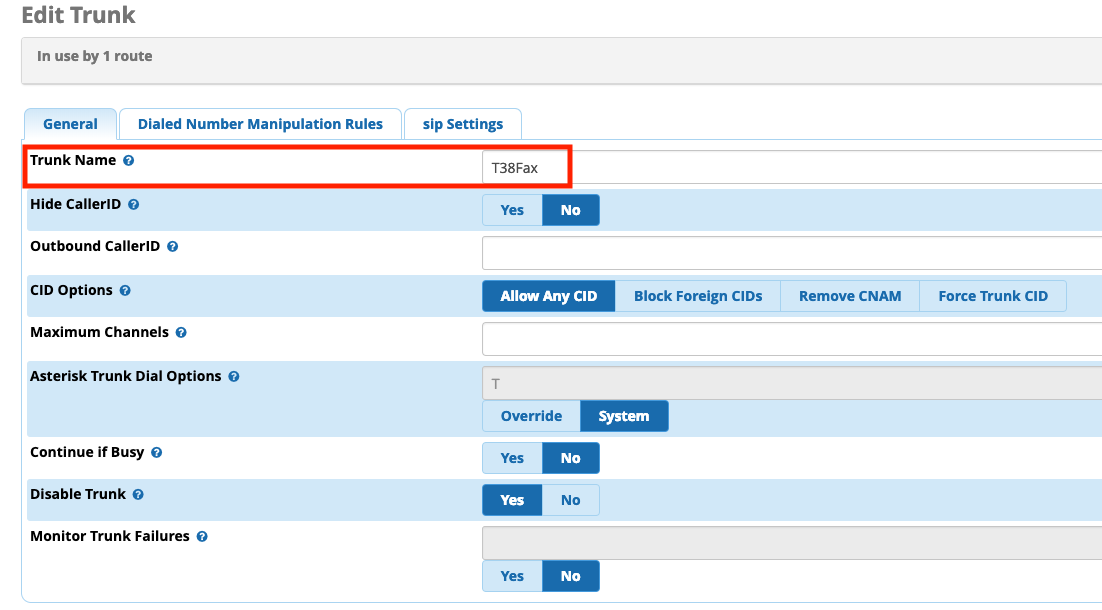
Navigate to Connectivity - Trunks and create a new SIP (chan_sip) trunk. On the General tab set the Trunk Name to something memorable. This is just a user-friendly label to identify the trunk.
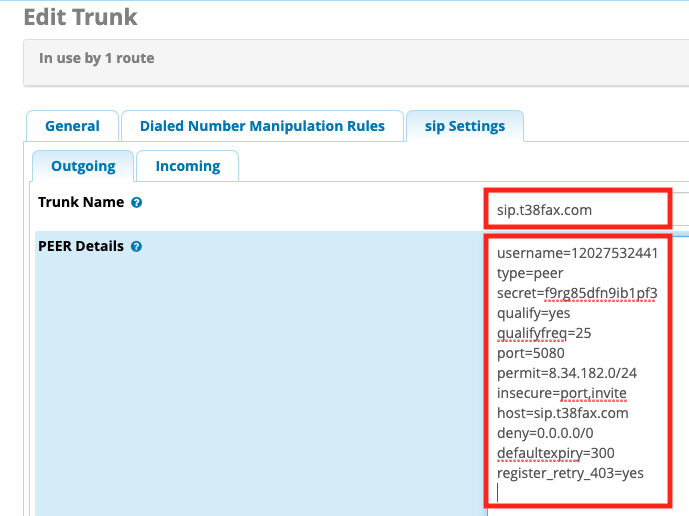
Then, on the SIP Settings - Outbound page, set the Trunk Name to sip.t38fax.com, and input the following trunk information into the PEER DETAILS section ⓘ:
type=peer
username=[SIP_USERNAME]
secret=[SIP_PASSWORD]
host=sip.t38fax.com
port=5080
insecure=port,invite
defaultexpiry=300
qualify=yes
qualifyfreq=25
deny=0.0.0.0/0
permit=8.34.182.0/24
register_retry_403=yes
When saved, your configuration should resemble the screenshot below. You may notice that, upon saving, the order of the PEER Details settings have changed: the order of settings displayed here also may not match the Asterisk config files. This is normal. Where important, the order of these settings will be automatically preserved in the config file.
Then, under Incoming - Register String, add this line:
SIP_USERNAME:SIP_PASSWORD@sip.t38fax.com:5080/SIP_USERNAME
You should remove all of the content in the USER Details section.
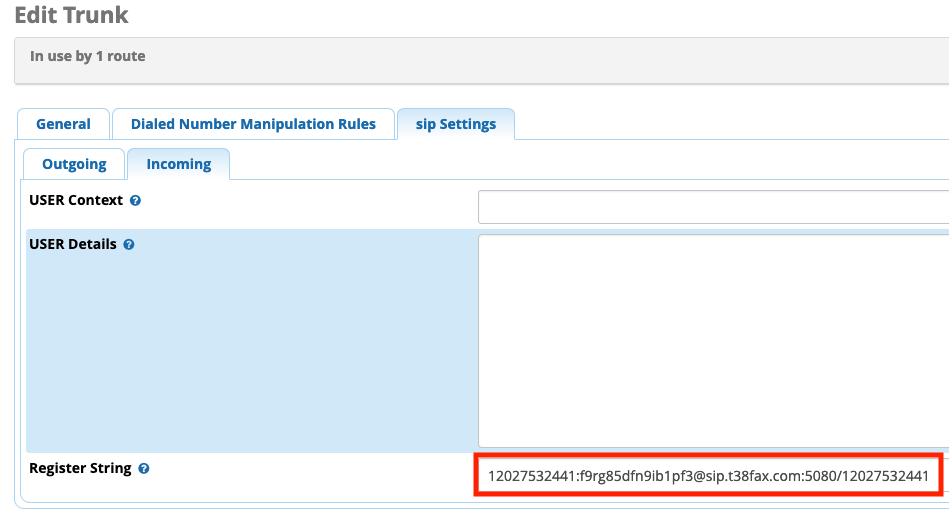
Remember to Submit Changes & Apply your configuration!
Create Your Outbound Route
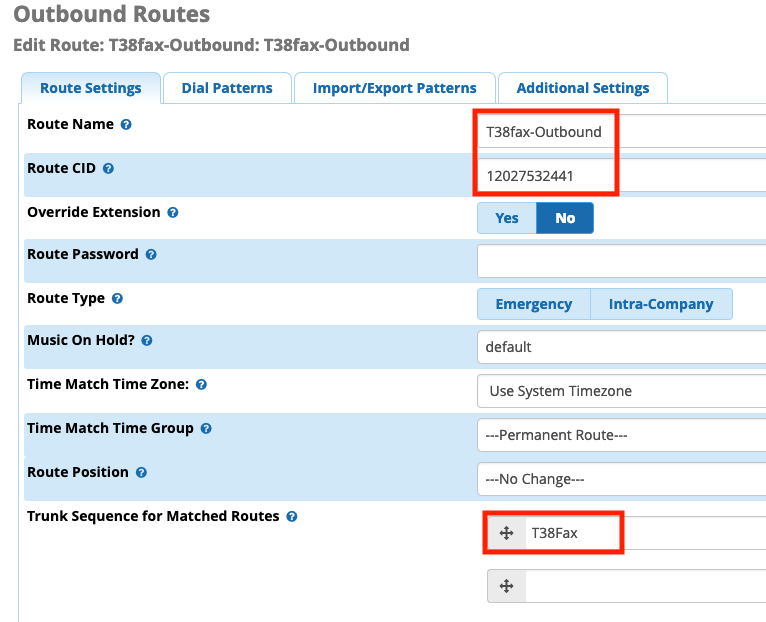
Now, navigate to Connectivity - Outbound Routes and create a new Outbound route. Give it a name, and make the default caller ID the same as your T38Fax trunk ID. This caller ID setting will be overridden by per-extension caller IDs. Add your T38Fax trunk to the "Trunk Sequence for Matched Routes" section. Submit your changes, and apply your configuration.
When done, your configuration should resemble the screenshot below:
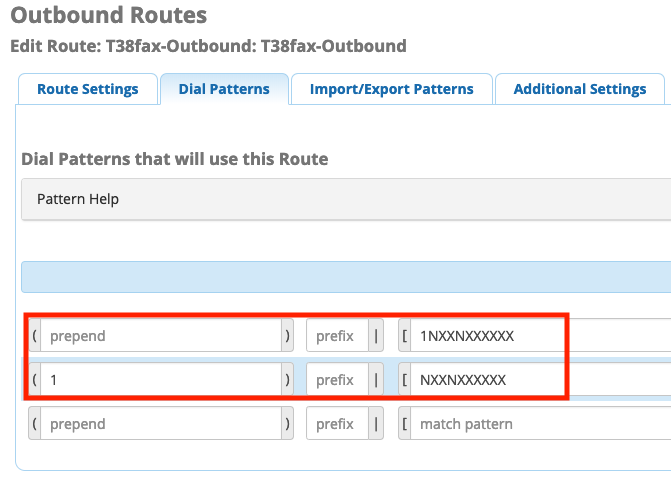
Next, go to the Dial Patterns tab and enter the following. Note that this doesn't cover 7-digit dialing, but this would be the appropriate place to add that functionality if desired.
Create Your Inbound Route
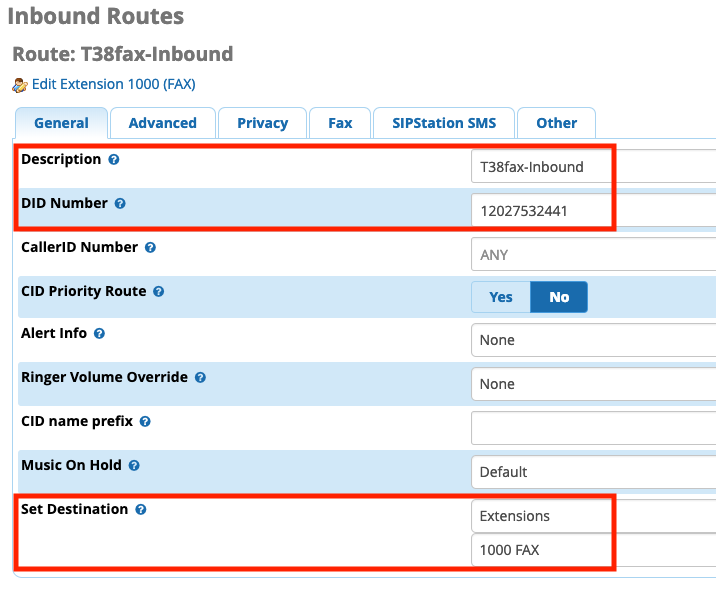
Create your extension if you haven't already: if necessary, refer to the Extensions appendix of this guide for reference. Navigate to Connectivity - Inbound Routes and create a new inbound route. For the DID Number use the DID you received from T38Fax.com, and set the Destination to your desired extension.
Configure UDPTL Settings
On your firewall, remember to open and forward all UDPTL ports for your FreePBX server. Even if your FreePBX server isn't behind a NAT device, but is providing firewall services, the UDPTL ports should still be opened. The default port range for UDPTL in FreePBX is 4000-4999. If you aren't able to do port range forwarding and thus must forward each port individually, you may want to reduce the UDPTL port range, maybe to around 20 ports. Additionally, some firewalls may consider ports below 5000 to be privileged, and may behave more restrictively on these lower ports. If you're having issues reliably faxing, changing the UDPTL port range is one possibility to consider here as well.
To change the UDPTL port range, add the following to udptl_custom.conf:
udptlstart=10000
udptlend=10999
Make sure to save those files, and then run the following command:
amportal reload
You should now you should be able to successfully fax using your T38fax.com SIP account! Need to test it out? Send a one-page fax to: 1-215-825-8792 and we'll send you a fax back that includes a small picture of your original document, and verify that ECM is enabled on your device! If you have any trouble with this, please feel free to open a ticket with our support team and someone can assist you!
Appendix: Create Your Extension
You will need to create an extension for your ATA so it can register to FreePBX and receive/make calls on behalf of your fax machine. Navigate to Applications - Extensions and on that page click Add New Extension - Add New Chan_SIP Extension. Give your extension an extension number in the User Extension field; additionally, you have the option to put an extension-specific caller id name in the Display Name field and caller ID number in the Outbound CID field. Take note of the User Extension and Secret fields, which contain the user credentials necessary to register to the server, and submit your changes. After you submit your changes, you can make any adjustments required to the extension itself, such as NAT or other requirements of your network.
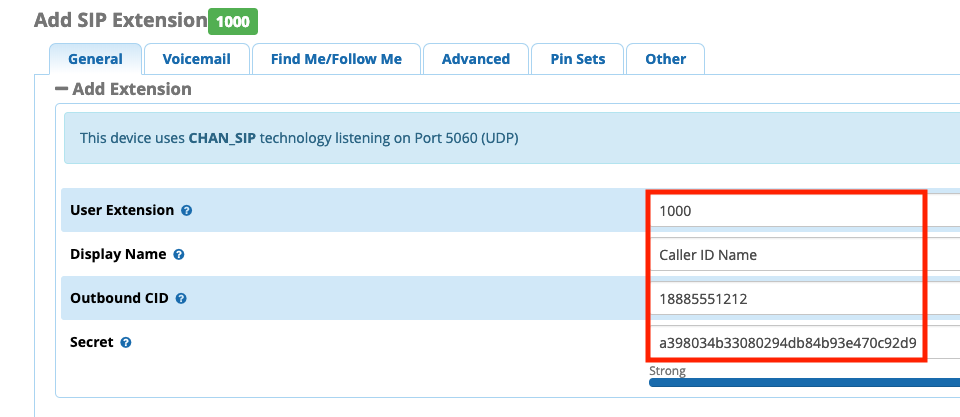
When configuring your fax device to connect to FreePBX using these credentials, we recommend that you still follow our guide for that device as closely as possible, changing only the proxy address, port, username and password where applicable.
Comments
0 comments
Please sign in to leave a comment.