Digium Switchvox is an award-winning IP PBX that delivers powerful Unified Communications tools, mobility applications, and robust calling features. Among those features is a very solid T.38 FoIP implementation Digium calls "Fax For Asterisk". Activation of Digium's Fax For Asterisk (add-on product) as explained in detail in the Managing Faxes section of the Switchvox Tools Guide.
Once you've activated your free Fax For Asterisk license in Switchvox, you're ready to get started with T.38 The following screen shots illustrate how easy it is to configure a Power-T.38 SIP trunk in Switchvox, and to use it for sending & receiving faxes reliably from within Switchvox.

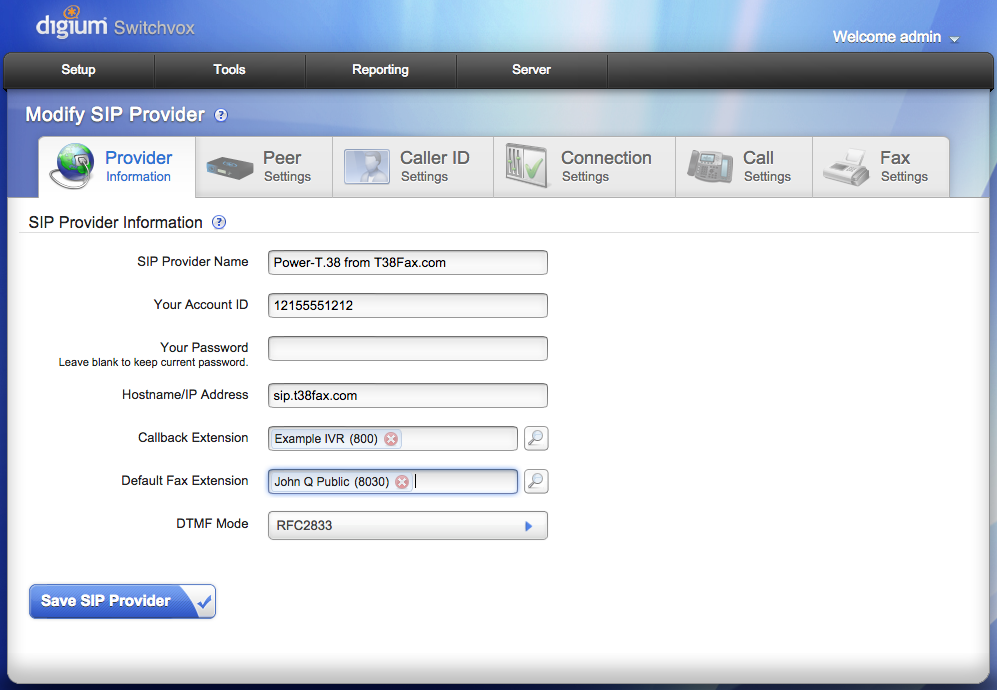
Step 1: As a Switchvox Administrator, Navigate to "Setup - VOIP Providers - Create SIP Provider". Your Account ID and password will be provided to you once you have activated your Power-T.38 Free Trial or production account. It's recommended to have a Default Fax Extension as a 'catch all' for incoming faxes that are not otherwise routed. If this account will also receive voice calls, you may want to have an IVR as your Callback Extension. Otherwise it will be the same as the Default Fax Extension.

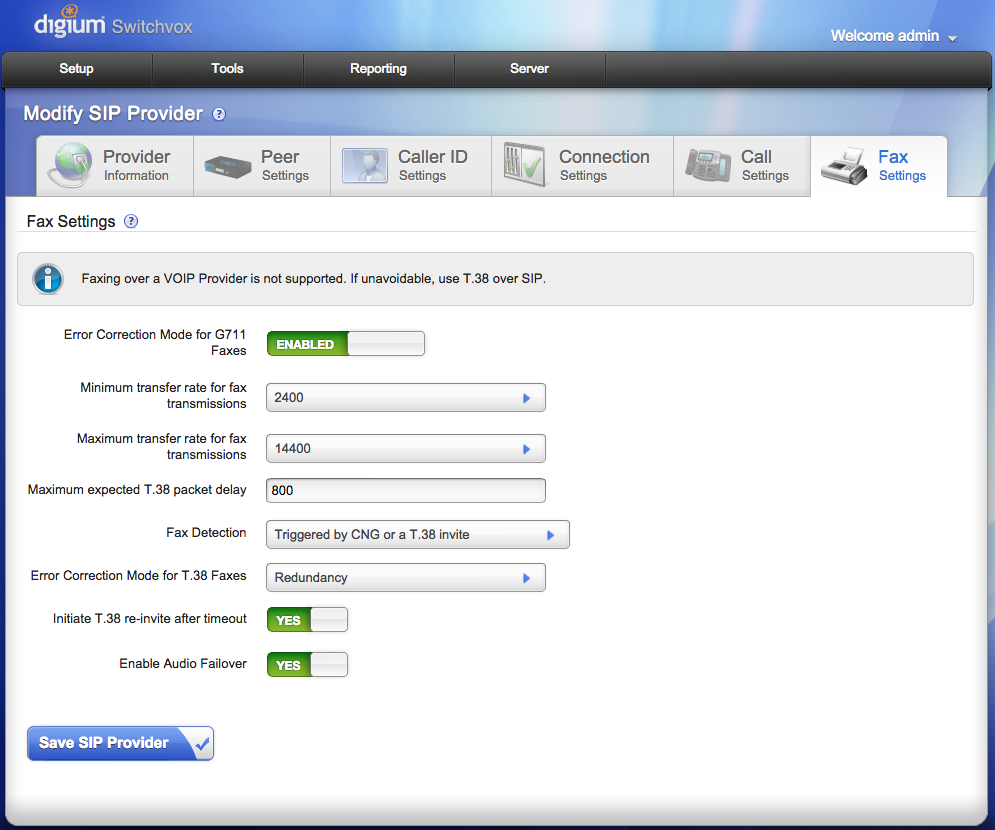
Step 2: Change Error Correction Mode to Redundancy, instead of FEC (Forward Error Correction), then Save SIP Provider.

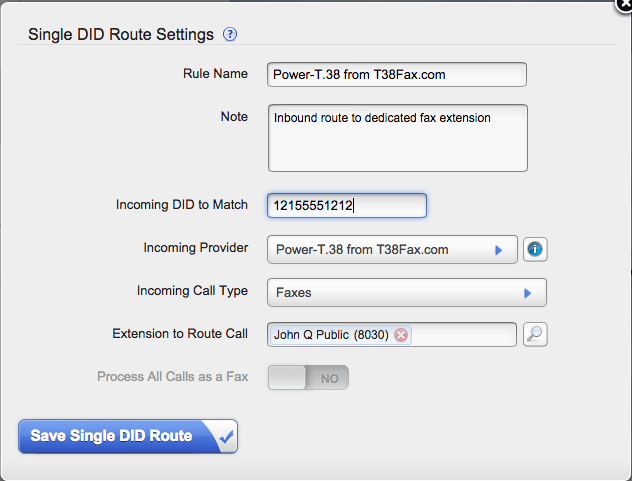
Step 3: Create an incoming rule to route incoming faxes (but not voice calls) to extension 8030. In this example, voice calls will continue to go to the Example IVR.
Once this is setup, it's relatively straightforward to allow all Switchvox users to fax from their desktop:
http://www.digium.com/en/products/switchvox/support/faxing-from-your-desktop
Comments
0 comments
Please sign in to leave a comment.