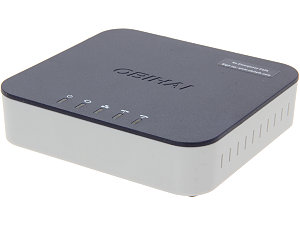
Obihai OBi202
Related Links:
Currently Recommended Firmware: v3.2.2 6259
T38fax.com has officially certified these devices after completing rigorous testing, designed to push these devices to the limit, and we're happy to say that the OBi202 has passed our requirements to make it to our Certified Device List. We've included a simple configuration guide on this page to help you get up and running. If you have any trouble, please open up a support ticket and one of our engineers will assist you as soon as possible!
Important Note: Please keep in mind, after you've configured each section, be sure to Submit your changes, and if the device requires it, be sure to Reboot your device to ensure that your configuration options are retained.
After following this guide, you may want to set up the second analog line per our Obihai Advanced Configuration Guide. It will show you how to configure two fax machines to independently use two separate numbers over one T38Fax trunk.
1. Firmware
Please upgrade your firmware to the newest version available. See the currently recommended firmware link above. The Obihai 3.1.X and 3.2.X firmware branches are parallel; installing a 3.2 branch is not necessarily an upgrade and we recommend the 3.1.X branch. You can do so from the "System Management" menu:

2. ITSP SIP
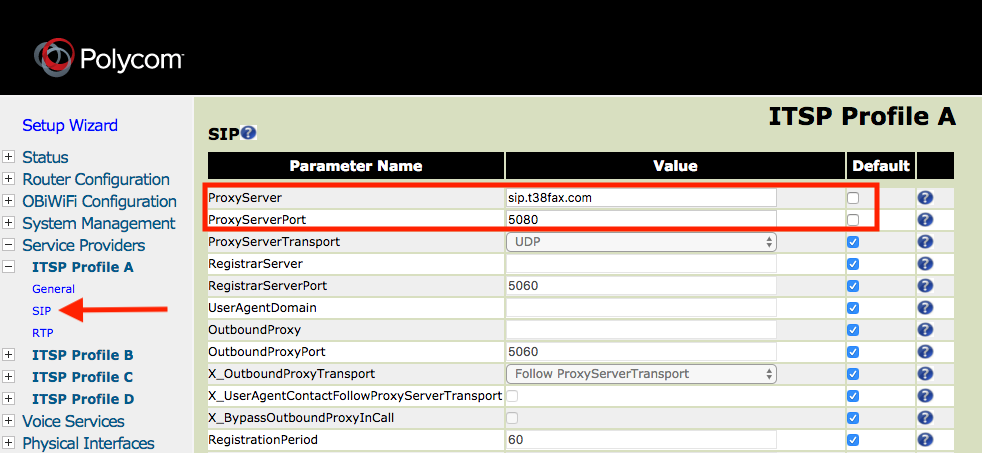
Next, select the "SIP" section under ITSP Profile A. Here you'll need to configure several options:
| Configuration Option | Required Value |
|---|---|
| ProxyServer : | sip.t38fax.com |
| ProxyServerPort : | 5080 ⓘ |
| X_DiscoverPublicAddress : | Disabled |

3. SP1 Service
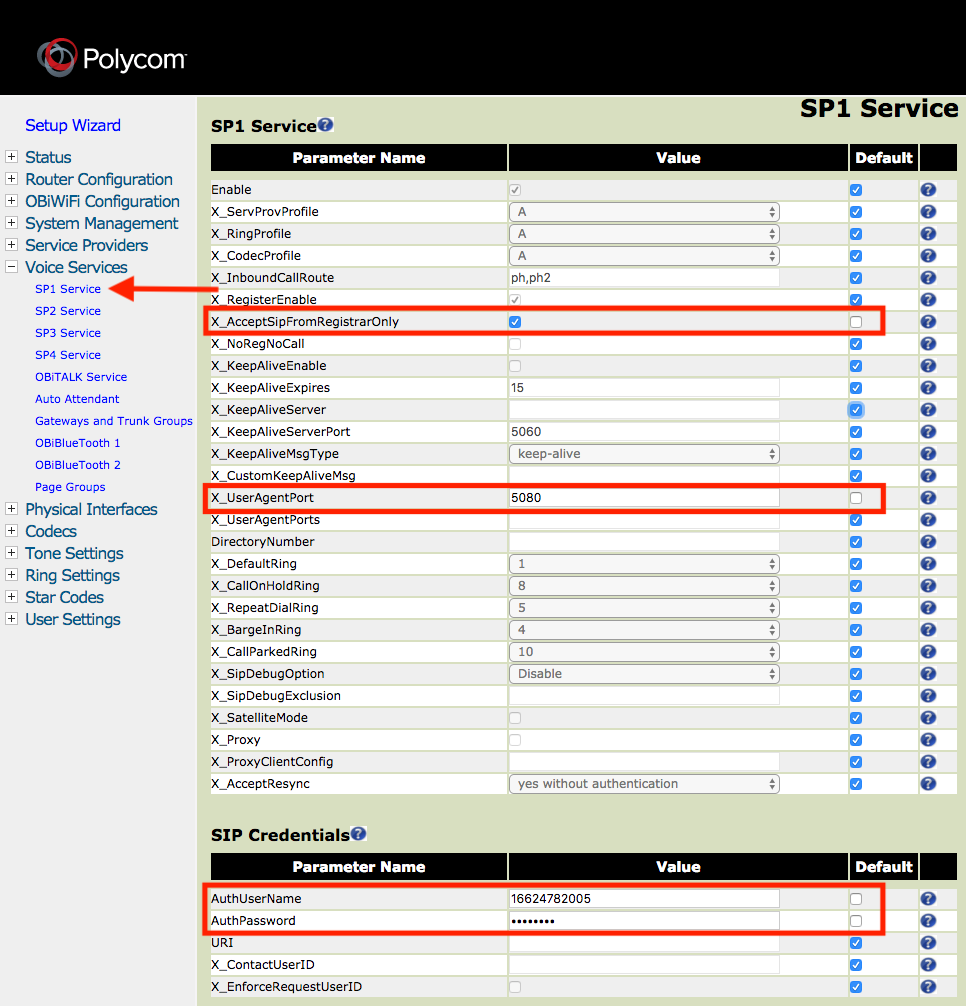
Next, navigation to the Voice Services menu, and select SP1 Service, this is where you'll configure your SIP Credentials to link into our service. Under SIP Credentials, configure the following. If you have more than one device at a site, each device at a site should have a unique port = 5080.
| Configuration Option | Required Value |
|---|---|
| X_AcceptSipFromRegistrarOnly : | Enabled (Check the Box) |
| X_UserAgentPort : | 5080 |
| AuthUserName : | SIP Username ⓘ |
| AuthPassword : | SIP Password ⓘ |

4. Codecs
Finally, you'll need to navigate to the Codecs menu, and select the Codec Profile A sub-menu. Scroll to the bottom of this menu, and find the "Fax Event" section. Enable this by unchecking the default box and checking the enable checkbox. Then, under the "Codec Settings" section, you will need to set the following:
| Configuration Option | Required Value |
|---|---|
| T38ECM : | Enabled (Check the Box) |
| T38Reinvite : | Callee Only |

At this point, you should be able to check the System Status page (Under the Status menu) and see that SP1 is registered, like so:

5. Fax Machine
Finally, configure your fax machine to work properly with your Power-T.38 SIP Trunk. Review our Recommended Fax Machine Settings for details.
Comments
0 comments
Please sign in to leave a comment.